How to Prepare a Painting for the Internet
By Matthew Bates www.mattbates.net
One of the most important things that an artist must provide on their website is accurate and beautiful images of their artwork. It has to be the next best thing to actually seeing the artwork itself. To do this I use digital technology. First, I take a digital photo of the painting. Then I open the digital file in Paint Shop Pro:
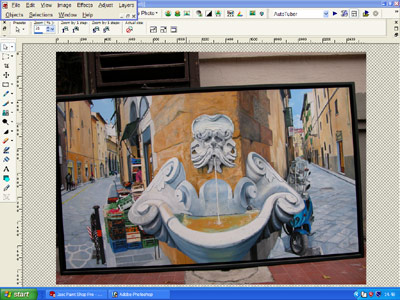
As you can see the painting is very slanted, and not at all rectangular as it should be. The first step is to use the Barrel Correction Tool to get the painting to have its rectangular shape again. In this case I used a strength of 35:

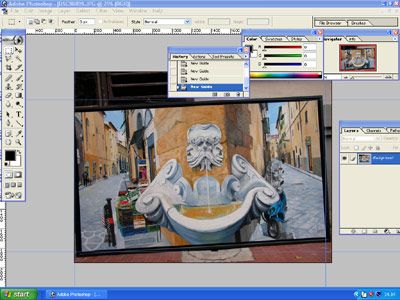
Now that the image is rectangular, save the file and open it in Photoshop. Drag guides to the extreme angles of the painting making certain that they are right on the edge, and not inside of the painting. If you do not know how to drag a guide, simply place the cursor inside of the rulers on the side of the image and drag a blue guide into the image. You can activate the rulers by pressing Shift+R. If the corners of the painting are near the edge of the image file then you may have to deactivate the Snap function which is found in the view menu or by pressing Shift+Ctrl+; at the same time. We will be activating and deactivating the snap function often so get familiar with it.
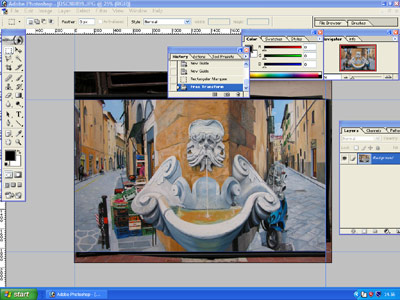
Now that the guides are in place use the Rectangular Marquee Tool (Shift+M) and activate the Snap function. Select what is inside the rectangle made by the blue guides. Now deactivate the snap function and from the Edit Menu choose Transform>Distort. Using the distort function, drag the corners of the painting to the corners of the blue guides. Take your time doing this making sure that the corners of the painting are exactly meeting the corners of the blue guides.
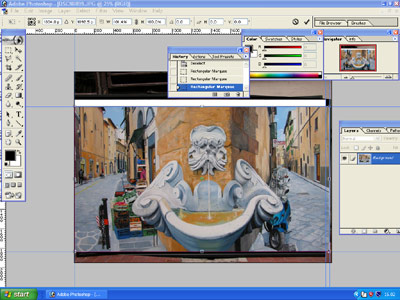
With the rectangular marquee tool go to the top menu of Photoshop and chose Style: Fixed Aspect Ratio. Add the dimensions of the painting in the width and height sections and drag from the top left corner of the painting to the bottom right corner of the painting. You may find that the painting does not fit exactly into this selection. If this is the case, add another guide to the right hand side of the selection and then reselect the painting in the normal mode of the marquee tool. When you have selected the painting, from the Edit Menu choose: Transform>Scale. Pull the sides of the painting so the it matches the blue guide on the right which matches the correct dimension of your painting.
Now that this is done reselect the snap function and with the marquee tool select the painting. From the Image Menu choose Crop. You will find that the image is now only the painting. To smooth out the edges, and add a nice border, select Edit>Stroke. Add 3 pixels and whichever color you like and press return. To really make your painting come to life from the Image menu choose Adjustments>Auto Levels. This should make your painting come to life.
Now we have to scale the image for the internet. From the image menu select Image Size and make the width of the painting no more than 650 pixels. This is a good size for the internet, not too big, and not too small to see all of your best details.
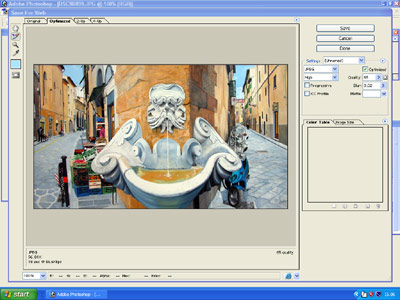
When you have done this it is time to save your work. From the File Menu Choose Save For Web. Choose to save your file as a .jpg at a value of 65 out of 100. Name your file with the name of your painting and save the file in your website default images folder on your computer. Your painting is now ready for the internet, fully optimised and beautiful!
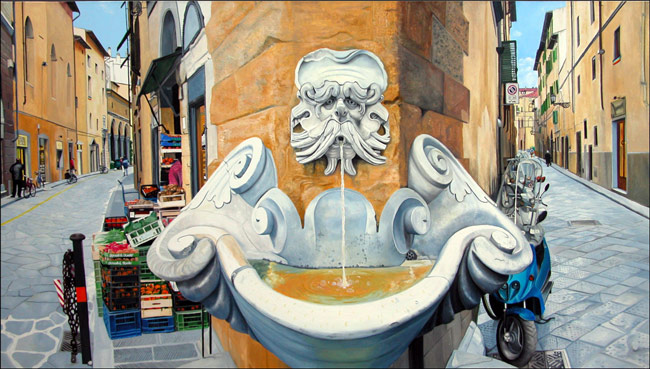
Here is the final product of this excercise:
Site Map - Flowers - Still Life - Cityscapes - Landscapes - Statues - Email - www.mattbates.net
©2012 Matthew Bates, all rights reserved