
by Matthew Bates www.mattbates.net
This is an article specifically oriented for visual artists who want to create their own websites, however the principals involved work for the creation and promotion of any website.
Let me introduce myself, I am Matthew Bates, an artist who works primarily as a painter of realistic subjects in oil paint on canvas. This article is about how I created my website www.mattbates.net and how I have promoted it to help my evolving artistic career. Visual artists are particularly suited for website promotion because the medium of the internet is very good for the transmission of our images. In the next few pages I will describe how I made my website and all that I ask you to do is to take a few deep breaths and relax, this stuff is easy, it only becomes difficult when we rush through certain steps and make a mess of things. When I started out 5 years ago I had no idea what to do to make a website, now I have made many, and my personal website has had thousands and thousands of visitors from every country you can name.
Step 1: Gather Your Primary Materials
You will need good photographs of your artwork, if you do not have them, I suggest that you focus on this first. You can take good pictures yourself with a digital camera. I prefer digital cameras for internet use because you go from digital to digital, it is a smooth transition. You don’t need to spend a fortune on your camera, because the image that you will be using will be optimized (and small) for use on the Internet. I will get into how to optimize the images a little later in this article. Place the artwork on an easel, or flat on the wall. You should have at least two good light sources on the right and left of the artwork coming in at a 45° angle. If you do not have good lighting, sunlight works well as a substitute. Be sure to place the lights in a way that there is no glare on the artwork's surface. You want to create an image of the art, not what it looks like in a room. Now place your camera on a tripod in front of the artwork. Position the Camera so that it is exactly in the center of the piece. Turn off the flash on your camera as this will only splash unnecessary light onto the painting. Place your head down by the camera and look again at the painting to make sure that there is still no glare on the art, it can change from a standing position to the point of view of the camera which is lower. Now place the camera setting on automatic and make sure that you have it on it’s highest quality setting for the photo. If you can make the camera take a TIFF image instead of a JPG as the quality is much higher. Now that you are ready, the lighting is perfect, the artwork is centered, set the timer on the camera to 10 seconds and take the picture. Just for safe keeping, take at least another shot as well.
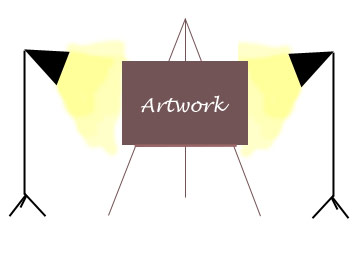
Set your Artwork on an easel and light the piece from the sides avoiding all possible glare
Now take the camera over to your computer and download the images into a folder in your hard disk. Create a folder which has your name on it, then in a sub-folder, called Artwork place your images. To elaborate the images I use Adobe Photoshop. If this is out of your price range, there are several low cost and free programs that you can use. A free program is The Gimp, which is a valid alternative to Photoshop. Photoshop also has a discount version called Photoshop Elements which can be used as well. Open the file in your graphics program. You will find that all around the painting there is extra borders from the wall that need to be cropped out. Take the cropping tool and carefully crop the painting so that only the image remains. In Photoshop go to the image menu and choose Adjustments>Auto Levels. Nine times out of ten the image looks great and ready to be saved. Sometimes you need to try the Brightness and Contrast which is Image>Adjustments>Brightness & Contrast to get the desired look. When the painting looks right we need to change its dimensions for the web. Go to the Navigator and punch it up to 100%. You may find that your image is incredibly large. At this point go to the Image menu and choose Image Size. You will find lots of numbers on the width and length sides, these are pixel numbers, it is a form of measure. If the amount of pixels is not showing then from the drop down menu choose pixels. Your image should not exceed the normal viewing area of a computer screen which is somewhere around 800 x 600 pixels. This is the maximum amount which will fill many screens and take a longer time to download on a dial-up modem, so I would suggest that the width should not exceed 600 pixels. Enter this amount and press Return. Now go to the file menu of Photoshop and choose Save for Web. This is an ingenious tool which customizes your images to be published on-line. Set the quality setting at 65% and make sure it is set to Jpeg, then click on Save. You will be asked to save the file in a certain folder, choose your Artworks folder and name the artwork its name, not "painting number1", its actual name. This is important because you will receive traffic on the internet because you remembered to actually name your painting. Most of my paintings show up favorably on Search engine results because of these simple factors. The name of your painting becomes a keyword, a keyword is simply what people write when they make a search. So name your paintings with keywords in mind. Think of what people will write and use those words. This is a good strategy to drive traffic into your site. Now that you know how to prepare your images, set up all of your paintings or Photos, or whatevers in the same file, which can contain sub-folders if you have a lot of work. Name the Sub-folders with keywords as well. Don’t write ‘July 2005 Paintings’ as a folder name. ‘Landscapes’ is much more useful keyword to promote your site. Try to be truthful about your keyword descriptions. Search engines hate it when people try to cheat their systems. Remember, there are no shortcuts to getting visibility on-line, there is a system, a system that awards content. You as an artist have lots and lots of content. This is absolutely in your favor.
Now you are going to make the thumbnail image of your artwork. A thumbnail image is a smaller image which works like a button on your webpage. Thumbnail images are really important because they give your internet visitor the possibility to see many of your paintings all at once before they commit to downloading a larger image. It is also nice to be able to show several of your artworks at once to give an overview of your body of work. Operating in Photoshop, you still have the image that you saved for the web up on your screen. Go to the image menu and choose Image size. In the width section write: 115 pixels, making sure that the "keep dimensions" box is checked. Press Return and you will see a much smaller version of your artwork on the screen. Now go to the File menu and choose Save for Web. Save the image in the same folder as its larger version and name it the same name as the original artwork, with Thumb at the end of the name Example: Artwork-Name-Thumb.jpg. Remember that the more organized your site is the better it will be for the search engines to index your material.
Now that your artwork is optimized for the web, you should put together a short, and I mean short, biography. No more than two typewritten pages are necessary. Nobody on-line is going to read the book of your life. Include all of the shows you have participated in, your contact information, and a small photo of yourself. This should be the most boring page (graphically) in your entire site, so that if people feel like it they can easily print this page for their records. So remember keep it simple! Save the file in the folder with your name on it and put it in a sub-folder with the title Biography.
Matthew Bates Paintings: Flowers - Still Life - Cityscapes - Landscapes - Statues - Email